


Ghirlandaio Gown Dress Diary-Week 1
As part of my preparation/practice blogging for IRCC8, I started keeping notes about what work I did on this outfit every day in the Squarespace blogging app and uploading pictures of what I was doing (mostly ripped off my insta stories). Then I started expanding on my notes, formatting pictures, and I realized it was starting to look like a fully fledged dress diary! Obviously my work for the entire month will be too long for me to submit for the IRCC updates and I will need to paint things in broader strokes, but I thought it might be fun to publish what I've done every week, and also hopefully encourage me to keep working on it a little bit every day, if I can.
This first week has focused on fabric prep, including working on carving my stamp for block printing my giornea fabric. I also got a really good start on my camicia. I don't know what it is, but I feel like starting a project with the base layer just gives me a really good starting point. They're labor intensive (if you choose to do a lot of hand sewing like me) but very simple, so they give me a lot of confidence to jump start the entire project!
April 1: I was traveling back from NYC where I visited the garment district and got the last of my fabrics for my giornea today, so I didn't get much done! I serged the ends of all of my fabrics so I could prewash them and also started to iron my crewel fabric for my gamurra in an attempt to get it to preshrink a bit since I didn't intend on prewashing it. To protect the embroidery, I ironed it face down on a fluffy towel placed on the ironing board and made sure not to press too hard. While ironing I noticed the back side of the fabric (which had been folded to the outside when it was shipped) was pretty dirty, especially along the middle where it had been folded and the selvedges. While the front didn't have these marks, I wanted to be sure the stains wouldn't get on the front with time so I decided to send it to the dry cleaners.

Stacked to the ceiling with fabric! My sister climbed up on a ladder to take this pic

Dying over all the velvets. They were stacked about 6ft deep behind me

Smoothie: powerfood for all day fabric shopping
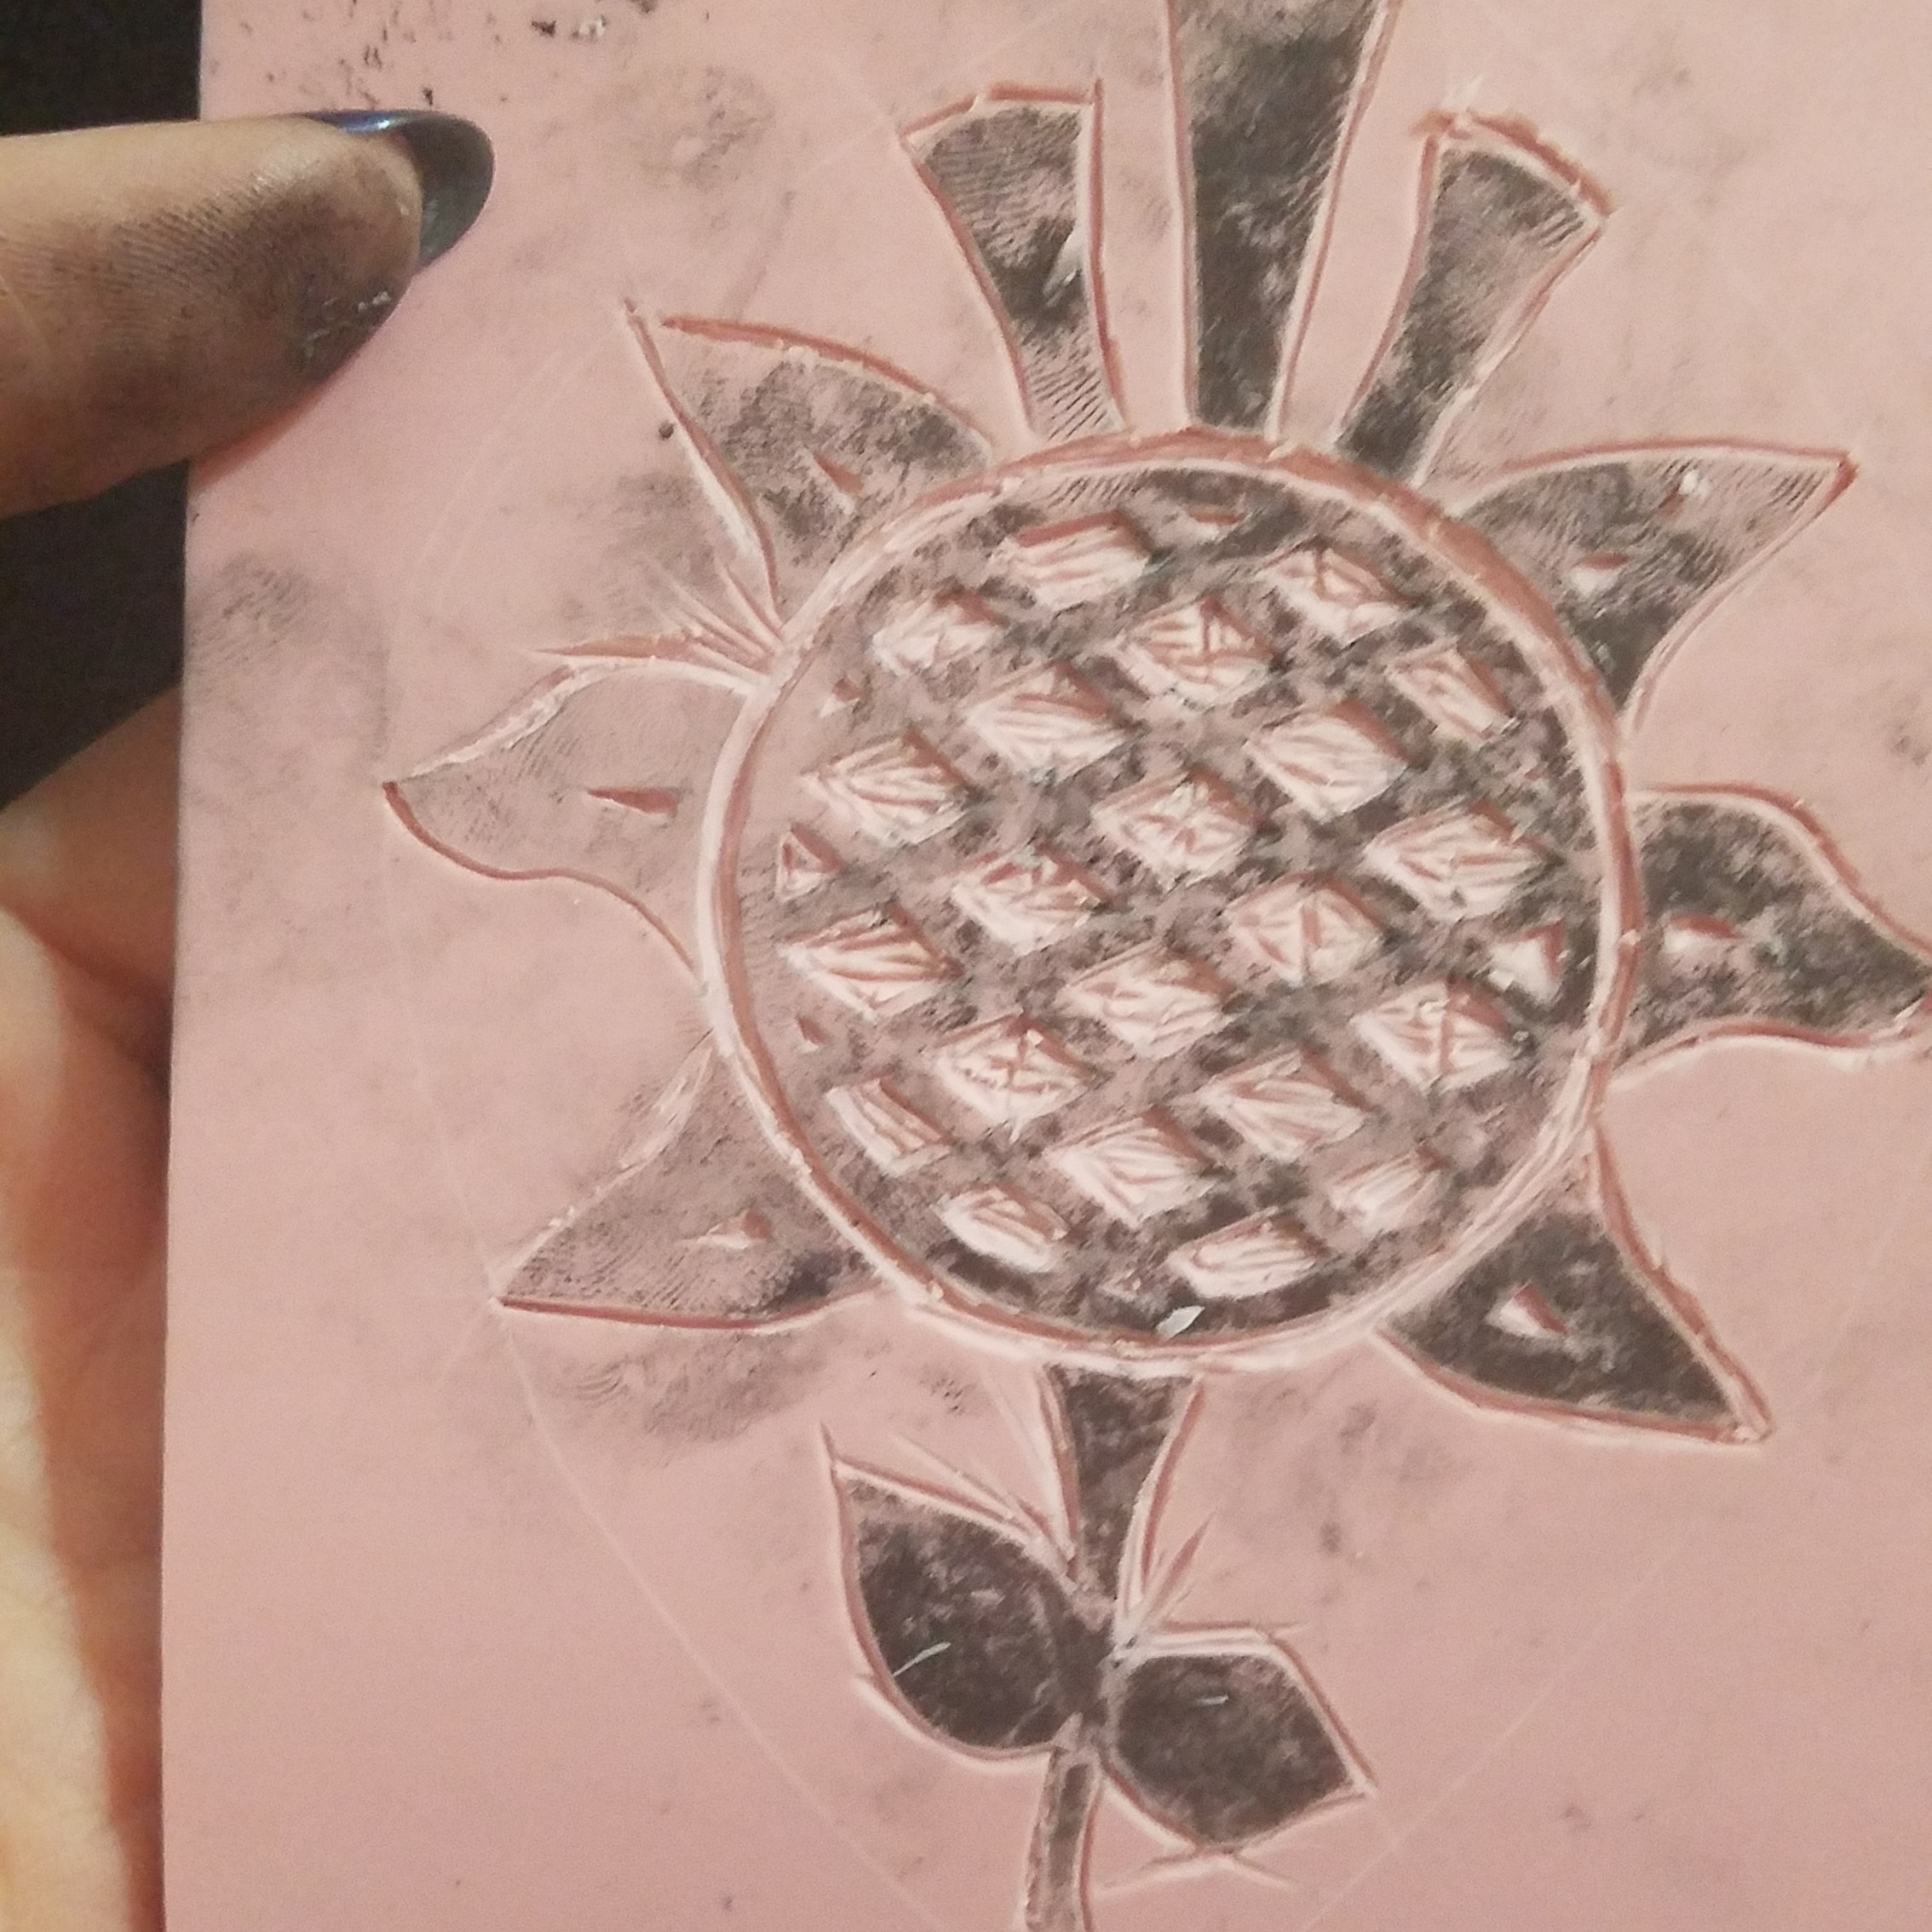
April 2: I washed all my my fabric (which resulted in lots of linen lint bunnies tumbling around my backyard!) and also started carving my stamp for block printing my giornea. After lots of searches, I couldn't ever find a fabric which matched the spread-out feel of the motif in the source image, so I decided to work with a printed fabric instead (not HA at all, but in the source you can actually see inconsistencies in the motif including not seeing it on the back of the fabric, which is what gave me the idea). I do plan on adding bits of beading and embellishing to the motif in order to make it look really rich. My friend helped me to digitally recreate the motif from the original garment in Illustrator, which I then printed off on my (toner) printer at work so I could iron it onto the stamp material. I was amazed at how well it transferred! And then it continued to be easy to transfer, mostly onto my fingers while I worked at starting to carve the block. There are lots of little tiny areas in this motif which make it difficult to carve, but I managed to get the entire motif outlined, and now will start on removing all the excess material from around it.

April 3: The super lightweight linen is extremely wrinkly when it comes out of the dryer, so I spent most of my time ironing it back to flat. To iron very wrinkly linen, it's best if the linen is actually damp instead of just using steam, so my spray bottle was a big help here. Just remember that ironing wet fabric produces a lot of steam and makes the fabric super hot, so be careful! Then I was able to cut out all the pieces of my camicia, which I do by pulling out weft and warp yarns to cut the pieces perfectly on grain. Time consuming, but worth it to work with perfectly on grain fabric, and this linen is too loosely woven to tear. I roughly followed the cutting guide on the Venetian camicia from The Realm of Venus, but cutting 2x historical loom width (56") for the front and back (which just so happened to be the width of my fabric), historical loom width (28") for each sleeve, and 1/2 historical loom width (14") for each side piece. I also had enough fabric left over for my first accessory, my handkerchief, which I begun to pull yarns out of for the drawn thread embroidery I will do.

April 4: I sewed all the pieces of my camicia together on the sewing machine and then cut half the seams down and pressed them to begin the flat felling process. I began to flat fell seams by hand, which I do to avoid having visible machine stitching on the outside of the garment. This was my best gusset yet, which I did combing several tips and tutorials I found online. To insert the gusset into the sleeve, I first sewed one side of the gusset to one side of the sleeve, then pulled it over and sewed the other side of the gusset down, continuing that line to close up the sleeve seam. This method came from Penny River Costumes, who very helpfully drew me a diagram on instagram! That half of the gusset, the seam allowance of the sleeve piece is flat felled over the gusset so you get a nice continuous line traveling all the way down the sleeve seam. To insert the gusset into the side piece, I roughly followed this godet tutorial from The Thread, although I was inserting it into a slit in the fabric instead of a pre-sewn seam. I reduced the seam allowance of the side piece as it got near to the point of the slit, and also reduced my stitch length to make it stronger here. In the end, that smaller seam is covered by flat felling the gusset seam allowance over it and the gusset insertion is perfectly smooth with no wrinkles or bumps at the points.

April 5: My gamurra fabric came back from the dry cleaners and while I still see a faint line on the back, overall it feels cleaner and brighter! In order to keep it that way, I hung it up in my backyard and gave it a good heavy dose of Scotchguard. I plan to wear this outfit at the Renaissance Festival and it gets very dusty there! It looks so beautiful hanging up in my back yard, but I couldn't leave it long because it's pollen season and I didn't want it to turn from white to yellow!

I also continued on carving my stamp, and really started to get it defined. Once my mounting block comes in, I'll be able to start testing it to see where the last bits I need to remove are.
April 6: I finished flat felling all the seams on my camicia! I stayed up a bit too late to do it but I had some new tv to binge so I didn't mind. I also started to work on the cartridge pleating on the neckline, which I did with two rows of parallel stitching. This fabric is so thin it compacts a lot and I could have made my stitches even smaller, but it was hard enough making my second line of stitching perfectly match the first line of white stitching in white fabric, so I chose to save my eyes instead. I could have cut the bands for the neckline, but felt like it was taking so long that when I went out of town the rest of the weekend I would have plenty to do...


April 7: After driving out of town, we spent most of the evening playing games but I did get a chance to work on some sewing, where I finished the neckline pleating much faster than I had anticipated. I secured my stitches and planned to size the neckline to the final measurement later, and started to work on the hem, knowing for sure that would take up the rest of the trip until I returned home to bind the neckline. Heck, the hem on my first camicia wasn't even technically finished! Since my camicia was all cut perfectly on grain, to do the hem I pulled out a weft yarn to create an easy to follow fold, then folded that bit up again on itself and whipped the edge down, creating a double fold hem which was easy to do with finger pressing only, since I didn't have my iron.

April 8: Well I surprised myself, because in a couple hours of early morning sewing I completely finished the hem of my camicia! All 224" of it. I then got to work on pleating the wrists, but being only 28" wide each I made quick work of that and was able to read a book on the drive back home instead of sew. When I got home I cut some strips for binding the wrist bands and sewed them on. To sew them on, I first matched up the raw edges of my pleats to the raw edge of my binding, using wonder clips to keep the pleats evenly distributed around the binding (this worked amazingly!) I used a running stitch to attach the two together, then finger pressed my binding up and away from the pleats and did a whip stitch through every pleat to really hold them in place. I then folded the last edge of the binding under and folded the whole piece over the pleating, enclosing all the raw edges and used whip stitches to hold it in place on the backside, as well. That method is all detailed here at Elena's Threads, but she does much tinier stitches than me. I don't even know how to get a running stitch that small! Unfortunately, I tried to push to finish both in the same night which resulted in my seam allowances being a bit off running the binding on so my two wrist bands are slightly different widths. But they will be hidden under my sleeves so it doesn't matter too much... but I'm still a bit upset about it.


