


Mood Sewing Network: Rainbow Gingham Shirt Dress

As a member of the Mood VIP program, you get access to their new releases several days before they are available to the public. So when I saw this Rainbow Checks Cotton Shirting hit the ‘new’ section with the special VIP marker, I jumped right on it! I’ve been obsessed with rainbow fabrics for a while but haven’t managed to get my hands on one so far. I decided on a super basic pattern to really let the fabric shine.

#sewnshownseated
I have a very basic shirt/shirt dress pattern which used to be free but isn’t anymore, but I’ve made it before and I knew it fit well so that is what I chose. This pattern includes a grown-on button placket, a shaped hem, patch pockets, and a belt. I decided to modify the long sleeves to short sleeves, which I hemmed with a turned-up cuff to make it more summery. I used plastic snaps instead of buttons, and added in-seam pockets.


My fiance was a big fan of this fabric, too and so he asked me to make him a bowtie! I have made him several bowties in the past using the free pattern available from Martha Stewart, and I was able to cut it out of several scraps.
I used two techniques in the making of this dress which I wanted to share with you. After I added the top patch pockets I tried them out with my phone in them and realized the fabric was a little lightweight to support that type of weight. Cotton shirting is such a great dress fabric because it is tightly woven but still thin so it has a nice drape, but it’s definitely not a bottom weight fabric that can support a lot of weight! I felt conflicted about adding in inseam pockets without some extra support. Confession time: I don’t think pockets are always the right option! Inseam pockets especially can pull on the side seam once they have something in them. The normal way to solve this is to attach the pockets to the waist seam but this pattern doesn’t have a waist seam so I had to come up with another idea!

The original pattern had two belt loops, one at each side seam, but I decided to add more - one in the center back and one each in the center of the front panel and with that center front belt loop I would be able to anchor my pocket. I drafted my inseam pockets to rise all the way to the waist and then when sewing my belt loops on, I stitched over the pocket to lock it in place.
The effect this anchoring had was amazing! Here I have one of the pockets anchored and the other not, and I’ve put one of my fabric weights in each pocket to mimic a cell phone. Without the pocket anchored the weight pulls on the side seam, dragging it down and creating folds. With the pocket anchored the weight is distributed and you can’t even tell I have anything in my pocket!

The other technique I used both on my pockets and also on the bowtie I made! When you turn a seam 180 degrees, such as when you’re turning a shape out or sewing a french seam, it is most effective to press that seam open first. But if your shape is very small or very curvy, it is very difficult to get your project flat and bust the seam! If you are unable to do that, ironing back just one half of the seam can have a similar effect to ‘prime’ the fabric to turn on the line of stitching.

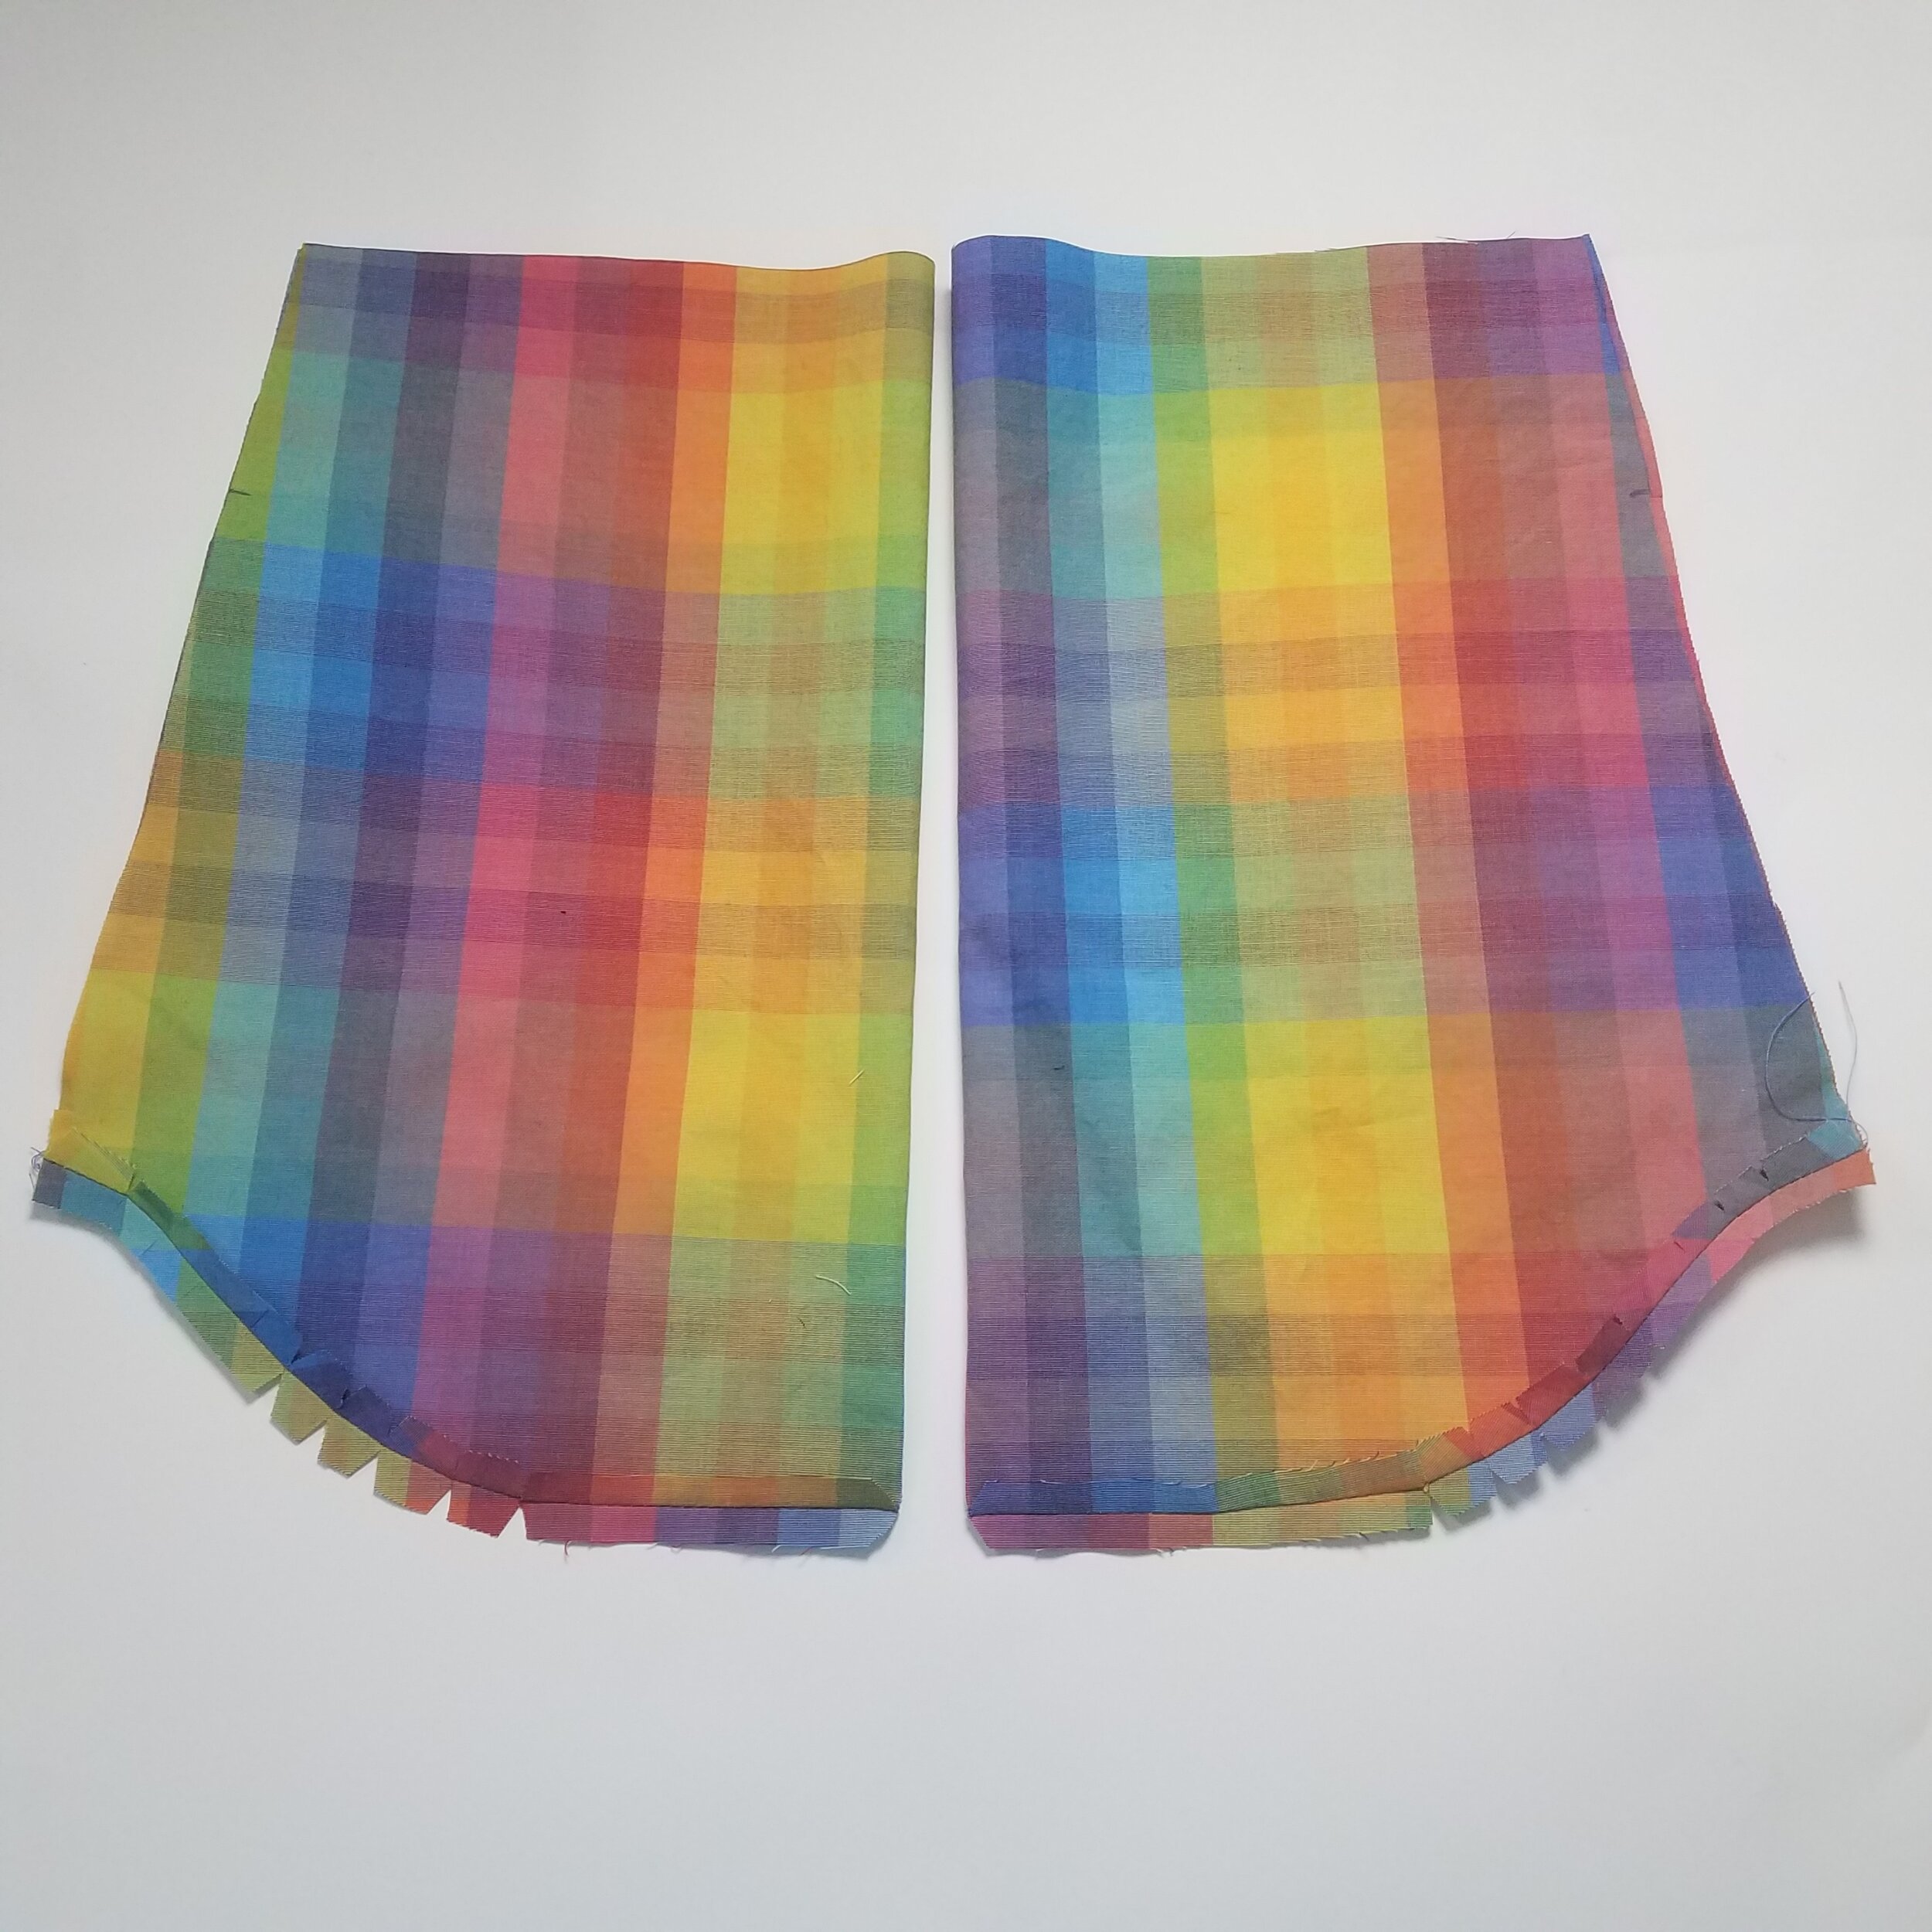
These pictures also illustrate the difference between clipping and notching curved seams - clipping refers to just snipping into the seam while notching involves cutting a triangle out. You should clip concave seams and notch convex seams, because once the seam allowance turns over, the seam allowance on the concave seams opens up and the seam allowance on the convex seams close together. If you didn’t notch those convex seams, the seam allowance would overlap and create bulk, and if you notched the concave seams the seam allowance would pull quite far apart.

Once you’ve pressed half of your seam allowance over, you will find that you are able to cleanly turn the fabric over on the stitch line! This technique will help you turn small shapes (I also used it on the tie belt!) and french seam curves.


While this fabric is currently sold out at Mood, it is re-orderable which means they can get more so make sure you sign up on it’s product page to get an email when it’s back in stock. If anything else at Mood catches your eye, you can use the code MSNJenn to get 10% off your order! And check out the VIP program to get early access to awesome fabrics like this, free shipping, and extra discounts on sale items.
Mood provided me with store credit to purchase this fabric in exchange for this blog post as part of the Mood Sewing Network program. All opinions are my own.

